First, read this: Collimating a Newt It will explain everything you need to know about collimating a newt. In addition, this site has a wonderfully complete explanation of collimation and collimation techniques. This site is so complete as to make my site redundant. But I didn’t find it until today, so I’ll leave my stuff here as well.
As with most new telescope owners, I was very intimidated by collimation when I received my XT4.5. That carried on well into the early days of my XT10. I read and read and re-read everything I could find on the internet. But every time I put that darn peep hole eyepiece in the focuser (the one Orion provides), I just got lost in all the reflections.
The thing that cleared everything up for me was the document that Gene Baraff has on the Skyquest group. I must have read 20 different documents on how to collimate a newtonian reflector and still didn’t get it. But for some reason, as I read through Gene’s document, it all clicked. I’m not sure if I was already on the cusp of enlightenment and just needed any sort of nudge, but Gene’s description just made sense to me. You can read a copy of his document here.
From that point on, it was just a matter of fine tuning my technique. It was no longer acceptable to be close, collimation had to be perfect. It was at this point that I figured out the inherent inaccuracies of each method of collimation. Mind you, I had not learned how to do a proper star test to check collimation, so I did not know if my collimation technique was actually inaccurate. I just assumed it must be because I could not get repeatable results with my laser. The Cheshire was a viable option, but I couldn’t use it at night and that’s kinda when I needed it the most.
Over the past year, I have had a chance to use several different methods of collimating my newtonian telescopes. I will try to list the goods and others for each type. First, here is a list of methods I have tried:
1. Collimation Cap: this is the little round cap with a hole in it.
2. Orion Cheshire/sight tube
3. Orion Lasermate
4. EZ Telescope 1.25″ Laser (just like the Orion Deluxe Lasermate)
5. Barlowed laser technique
6. Catseye cheshire and auto collimator
7. Star collimation (you should always do this)
All of these methods will work to some degree of accuracy or another. My favorites are the barlowed laser and the Catseye cheshire/autocollimator. These have proven to be the most repeatable and are very, very accurate.
Regardless of the methods chosen, the article listed above covers all the aspects that are involved. You can pick a different method of accomplishing all of these elements, but they all must be done.

COLLIMATION CAP
This is the little round cap that comes with most Orion reflectors. Here’s a picture of one.
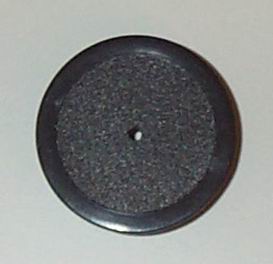
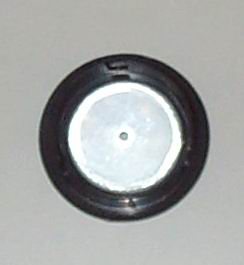
Its purpose is to provide a good reference for you to use when collimating your telescope. If you just look down the focuser without the collimating cap, it’s hard to tell where to put your eyeball. This little cap keeps your eye close to the center and makes alignment easier.
CHESHIRE / SIGHT TUBE
The most complete collimating device ever invented.
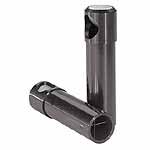
The article I have referenced several times uses a combination sight tube / cheshire to illustrate how to collimate a reflector. It really is the only tool I have used that can do every step that collimation requires. I’ll let you refer to the article for all the gucci pictures and most excellent explantion of how and why it works. Suffice to say it can do everything and more that the fancy lasers and such do.
The drawback that keeps me from using this as my only method of collimation is that I cannot use it at night. You need some sort of light shining in the little 45 deg mirror to make it work. You can do this at night by shining a flashlight into it, but that’s not for me. This is the same reason I don’t use the Catseye method at night. First time I drop that flashlight down the tube onto my mirror will be a horrifying moment indeed. No flashlights for me. For night time collimation, I use the laser and barlowed laser method.
A bit more on the sight tube.
The sight tube part is just that. Without the cheshire, a sight tube is simply a hollow tube with a cap on the end that has a tiny hole in it. This is the tool required to center the secondary under the focuser. The sight tube should have a ratio of length to diameter close to the focal ratio of your telescope. For instance, a sight tube for an f/5 telescope should be 5 times longer than it is around. This makes it easier to align the secondary under the focuser. If you use a sight tube that is too short, the secondary will look a lot smaller than the hole in the bottom of the sight tube. If you use a sight tube that is too long, you won’t be able to see the edges of the secondary.
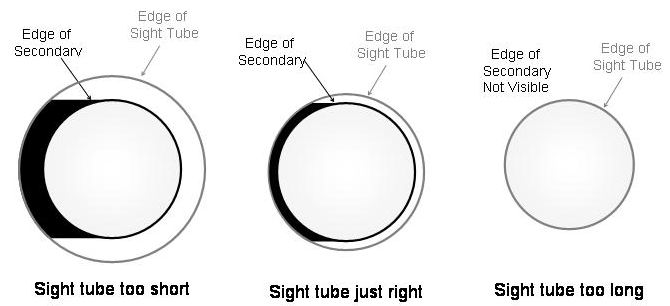
You can rack the sight tube in and out a bit to get the right spacing around the secondary.
LASER COLLIMATORS
I am not a big fan of a straight laser type collimation. Either a regular laser or the EZTelescope or Orion Deluxe lasermate lasers. Both suffer from the same weakness. They rely on the accurate and repeatable placement of laser in the focuser every time in order to be useful. You also need to collimate the laser, which might be hard or not so hard. As an engineer, it gives me the willies to see that I can effect the accuracy of my alignment by just lightly touching the laser in the focuser. I abandoned this method long ago.
I still use the straight laser to align the secondary after dark. This is not the most accurate, but good enough for after dark alignment.
BARLOWED LASER
The barlowed laser method takes out all of the variables mentioned above. Here is a most excellent description of Barlowed Laser Collimation.
Gene posted a message on the Skyquest group about this new method of collimating a newtonian reflector with a barlowed laser. As with all things related to tinkering, it immediately piqued my interest. I had the laser, I had a barlow, all I needed was a target and I would be set. So, I made a MEBLSPTT [mebblespit] (Most Excellent Barlowed Laser Spot Target Thingy). You can read about my advanced construction techniques for the MEBLSPTT (and follow on NIDPMEBLSPTT) MEBLSPTT.
I am a big fan of the barlowed laser method, but it does not collimate the entire optical train. It only adjusts the tilt of the primary. But it does that very, very well.
For me, this is the defacto method for aligning the primary at night. As accurate as any other tool I have used. For aligning the secondary at night, I use the straight laser method.
HOW TO MAKE A BARLOWED LASER TARGET
Gene Baraff has a good document on how to make a target that will work for most any telescope. There is also a copy on the Skyquest group.
Another suggestion that just popped up on the Skyquest group was a spray paint can lid. You could use any plastic cap that fit the draw tube of your focuser. A white one would be ideal. They usually have a dimple conveniently located right in the middle of the cap. Drill an 1/8″ or so hole right there, put some black magic marker on the inside to prevent any leakage and you’re all set.
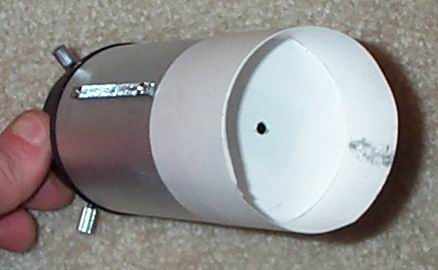
I made an extremely simple peep hole thingy for the barlowed laser out of index cards. I taped 2 index cards end to end with scotch tape and rolled them around the outside of the bottom of the draw tube (I took the draw tube out of the focuser for convenience).
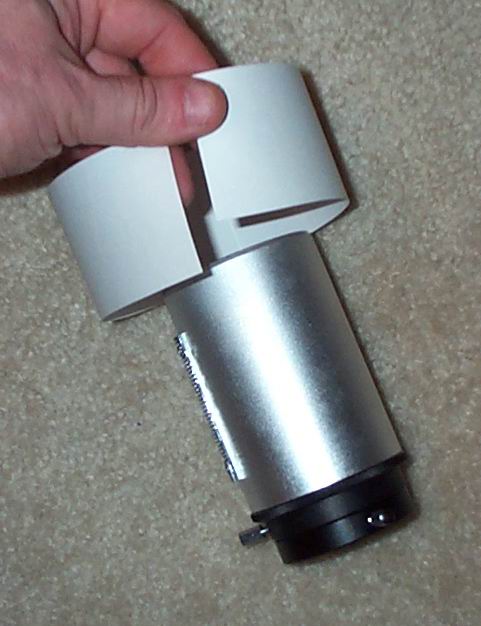
little scotch tape once I had it wrapped firmly, and I have a nifty tube that is quite sturdy and the perfect size. Now I just put the focuser draw tube bottom on a stack of 5 index cards and cut out 3 perfectly sized and matched little index card circles:
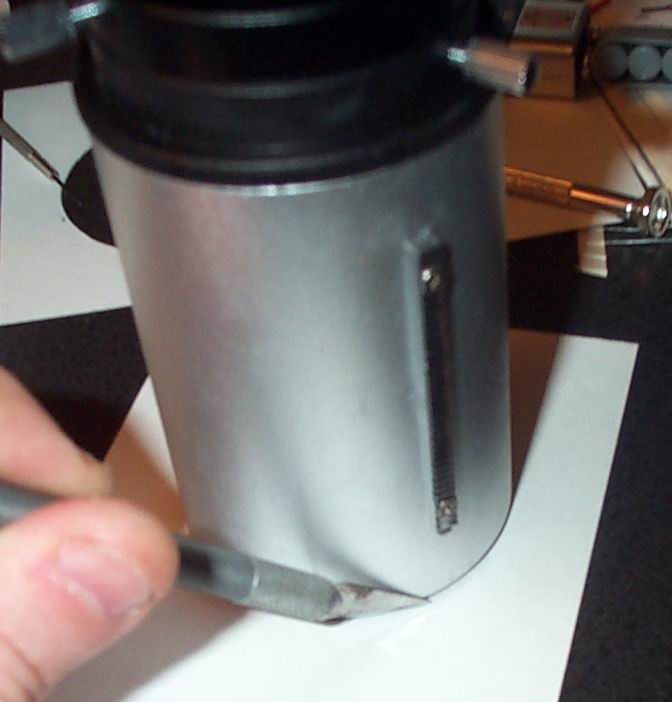
This worked great because the circles were the exact size and shape to match the inside of the paper tube I had made earlier.
Now you have to blacken both sides of 2 of the index card circles to keep the barlowed laser from leaking through outside the center hole. I did this with the kid’s crayons.
Next, I slid the index card tube over the bottom of the draw tube until it butted up against the bottom of the rack. I left the index card tube about 1.5″ long for strength, but that’s certainly not required. I then slid the index card circle that had no black on it inside the paper tube until it was flush with the bottom of the draw tube. Now, where to put that darned little hole and how big to make it? I just put the Orion laser in (not barlowed), turned it on and used that spot size and position as a guide. I checked this later with the cheshire ep and it matched perfectly. I’m not sure how critical the exact placement of this hole is, but it seems critical, so I was careful to get it right in the center. You could also do the fold the circle twice trick and the intersection is the middle.
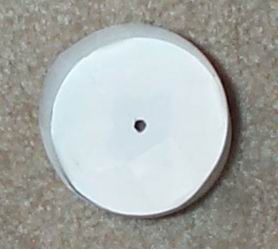
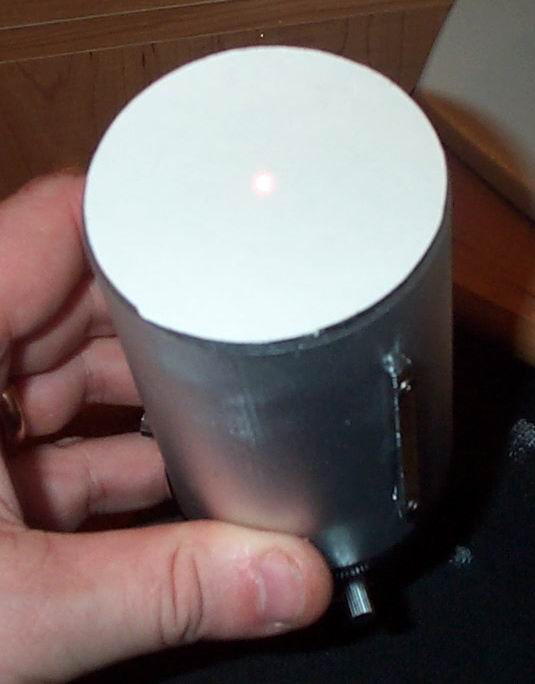
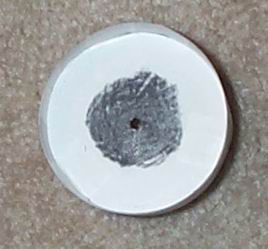
I cut a hole through all three circles at once with a sharp exacto knife. Glued the circles together with the kid’s glue stick. Now I put the circles in the paper tube with the black ones up and the white one on the bottom. Scotch taped them in, and voila, a most excellent barlowed laser spot placement thingy. Works like a champ.
The best part was wiggling the focuser and laser all over the place and the shadow of the center spot never moved on the most excellent barlowed laser spot placement thingy. That is truly spectacular.
Anyway, this looks like the way to go for primary alignment. I’m tickled pink.
Well, my MEBLSPT did not survive the heavy dewing last night. For those that might remember, it was made of index cards and scotch tape. Worked great for the winter and spring, but, alas, summer dew has caused its untimely demise.
So I replaced it with the NIDPMEBLSPT (New and Improved Dew Proof Most Excellent Barlowed Laser Spot Placement Thingy). It’s the same concept but this time I made it out of one of those flexible cutting boards Gene recommended for an aperture mask. Here’s a pic:
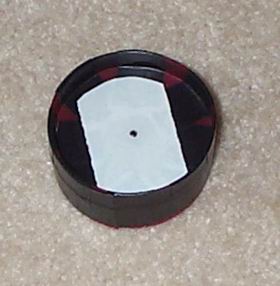
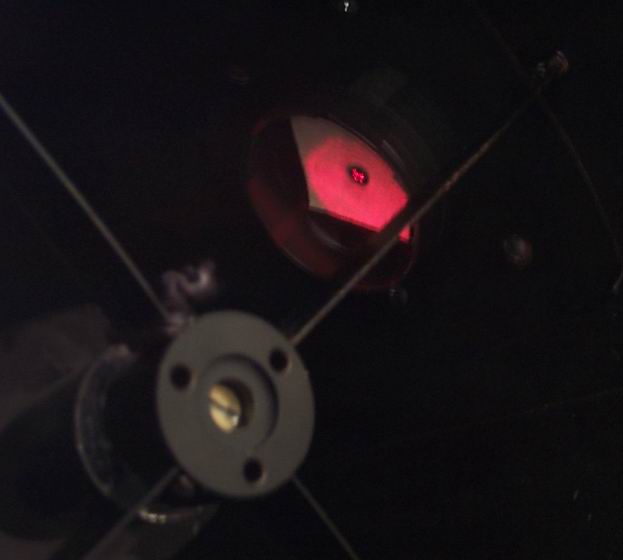
I used electrical tape to secure the center piece of plastic. I put electrical tape on the inside (facing the laser) to block stray laser light from getting around the hole. I put a piece of carpet tape across the middle outside for the return donut. This may get replaced with white electrical tape if I can find it in the work bench.
I used electrical tape to secure the center piece of plastic. I put electrical tape on the inside (facing the laser) to block stray laser light from getting around the hole. I put a piece of carpet tape across the middle outside for the return donut. This may get replaced with white electrical tape if I can find it in the work bench.
Much sturdier and dew proof. So, if you have built or were considering constructing a MEBLSPT, I highly recommend going with the NIDPMEBLSPT if you are expecting dew.
CATSEYE CHESHIRE AND AUTOCOLLIMATOR
STAR COLLIMATON
A star test is required as a verification of whatever method you use. That means a star test for collimation. The best site I have found that explains how to star collimate is here. If the collimation method you use proves accurate via a star test, then you should stick with that. One word of caution: a precise star collimation check must be done in the best of seeing conditions. Simply defocusing on a star and evaluating the concentricity of the diffraction rings is good enough to get in the ballpark, but won’t tell you if you’re gnat’s ass on. That requires an in focus star with a steady airy disc and that requires very good seeing. Don’t be lulled into a false sense of security by those apparently perfect out of focus diffraction rings. They are not precise enough to get that final tweak for perfection.
WHY BOTHER?
So, really, how important is collimation? In my experience with my XT10, it is critical. With a slower f/6 or f/8 telescope, it is still critical, you just don’t have to be as accurate as with the f/4.7 XT10. I can say for certain that 1/30th of a turn on one of the collimation knobs will mean the difference between seeing 4 craterletes in Plato and 9 craterletes. It could make the difference in spying the Enke division in Saturn’s rings. More often than not, though, poor seeing will mask any errors that may exist in your collimation. If the seeing is bad, you might not see any craterletes in Plato or even the Cassini division in Saturn’s rings no matter how accurately you are collimated. But why miss an opportunity to see such detail because of something you have complete control over?
