
Flocking. What the heck is that? You know, I’m not really sure what the origin of the term flocking is as it relates to telescopes. But, as Lesley Nielson might say, that’s not really important right now.
The goal of flocking is to eliminate all stray light inside your optical path. The only light that you want to get to your eye should come directly from the source, hit the primary, reflect off the secondary, enter the eyepiece and then enter your Mk1 Mod0 eyeball. And all that light should arrive at the same time, not having bounced off of myriad extraneous surfaces inside the optical path. Geesh, that seems easy enough, right? Give this a quick read: Baffling
That should explain everything you need to know about why to baffle and generally how to baffle. I chose to use flocking paper to do my baffling. It is available from Protostar in rolls that are 30″ wide and cut to length for $.40 / foot. It is self adhesive and easy to work with. I have had mine in for 5 months through winter cold, summer sweltering heat, and heavy dew and it’s still sticking in the OTA. I love this stuff and flock everything with it. My kids got too close one night in the garage and now I can’t find them.
There are alternatives that are reported to work just as well as flocking paper. You can buy self-adhesive felt at craft stores and the Marts on the cheap. You can also use non-adhesive felt and use double sided carpet tape to hold it on. Spray adhesive also works. I’m always impressed by the number of ways we can come up with to flock our telescopes. But, IMHO (and I haven’t gone this route often on this web page), the flocking paper is worth it. Buy 80″ of the flocking paper for $32 + shipping and be done with it. With 80″, you can flock the top and bottom 15″ of your OTA and still have an 8″ x 30″ piece left over for the secondary and what not. The stuff works, it’s easy and it holds up well.
Before I go on to describe how I flocked my XT10, here are some before and afters:


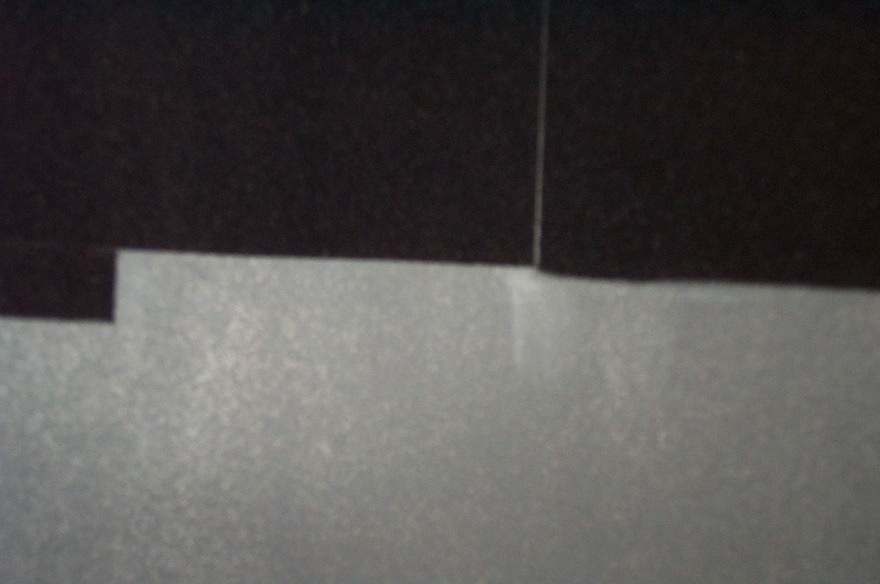
This is side by side inside the OTA of non-flocked (bottom) and flocked (top).
All of these pictures were taken with the flash on. It is obvious to me that the flocking has greatly reduced the reflected light from the camera flash. I ran through the procedure for finding stray light that is described in the article, and I can find none after the flocking.
So, how does one flock an XT10? It’s really quite simple. Whatever you use to flock it, I recommend flocking the top and bottom 15″ of the OTA all the way around. If you have the time, patience and material, flock the whole darn thing. I may end up finishing off the center part of my OTA someday, just to make it consistent.
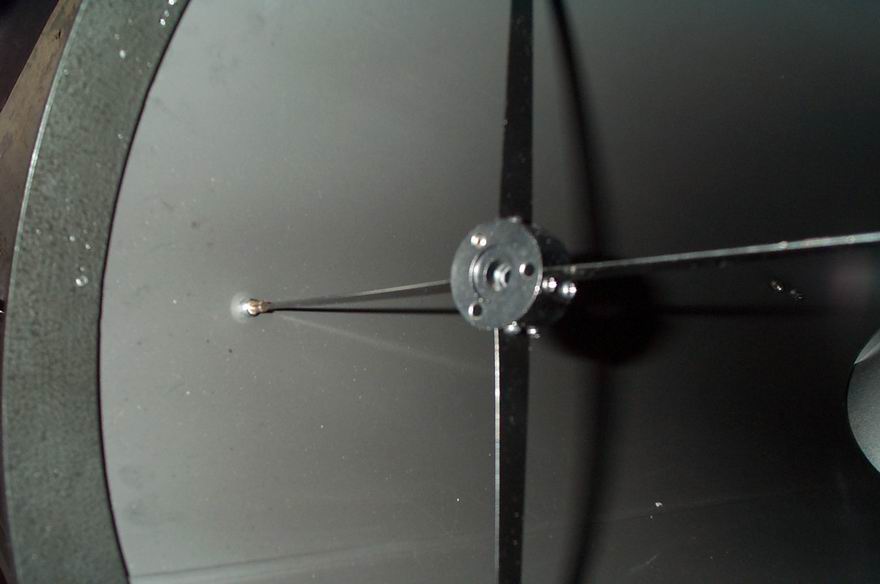
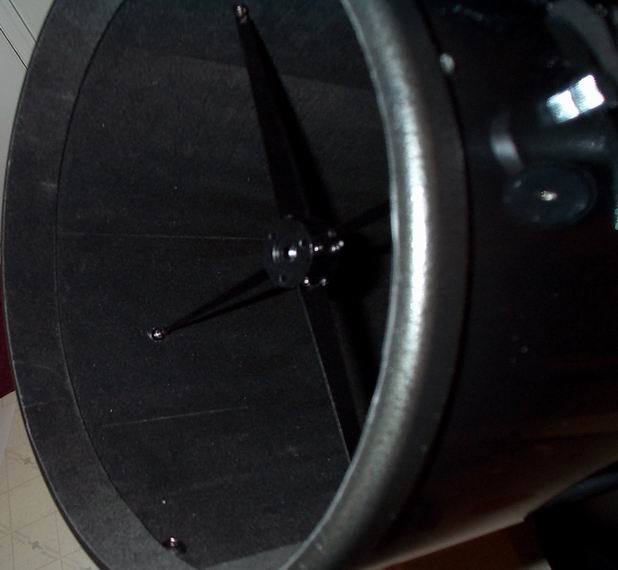
Other areas that can be flocked are the inside of the focuser draw tube and the secondary edges/holder (depends on what type of secondary you have). The Synta secondary is exposed and the upper bevel is a great candidate for flocking. The Guen Sheng secondary is in a holder, so I’m not sure what you could flock on there. Do not flock the secondary spider.
When I flocked my XT10, I removed everything: primary, focuser, finder bracket and secondary with spider. This made it very easy to get to everything and the bolts that hold all that stuff on helped keep the flocking paper in place. If you don’t feel comfortable removing the focuser and secondary/spider, then you can flock around it. You can also just flock opposite the focuser as suggested in the article. The nice thing is, as you get more comfortable with tearing the XT10 apart and getting it back together properly, you can add more flocking later.
So, does it help? You betcha. This is one of those mods whose benefits were immediately apparent at the eyepiece. Here is my observing report the night after I flocked:
Very clear, but very windy tonight. Seeing was a 1-1.5 (on that 1-5 scale) at best. Transparency was very good. Mag 5ish naked eye.
I also got the new Pentax 10.5 XL in, so I gave that a whirl.
I was observing in my driveway with 3 neighbor’s porch lights on, as usual. So, the light pollution was typical of what I see.
The flocking helped immensely. I had a very long observing session last Tues where I compared my ep’s on Jupiter on a good seeing night. I had a pretty good idea of what the background looked like with the XT10 not flocked. That night, the Edmund RKE 8mm was the only ep that had a black background.
Tonight, it was remarkably black. I saw an improvement in every ep that I looked through. The Meade 14mm UWA looked much better. The Expanse 9mm had improved contrast, but the ghosting on Saturn and Jupiter was more noticeable now. The Edmund 8mm was still black.
The Pentax was remarkably black. It was the equal of the RKE, if not better. Very nice EP and easy to use. I had the neighbors over for a quick look at Saturn, Jupiter and Orion. Kids were 8 and 3. It was the first time they had looked through any telescope. The easy to use Pentax allowed them to see the planets at 229x without having to struggle with eye placement. Of course, the tracking platform helped a little, too.
So, the flocking definitely improved the views. I think a few more sessions will verify this more. I have no quantitative data that I can put forth to prove it. But qualitatively, I would give it a 4 on out of 5. Certainly not a requirement, but for $40 and an hour’s work, how can you go wrong?
I have had many nights of observing since then and can testify to the effectiveness of flocking. It is a simple mod that really improves any telescope. Just do it.